Virtualized Services Directory on Hyper-V for Windows Server 2012 R2 – part 2

In the previous article of this serie, we deployed an empty VM to host our VSD server, in this second part, we are getting serious and deploy the Linux OS and the VSD server role!

Proceed to CentOS 6.7 Installation

We will proceed to default minimal install of Centos 6.7:

1. Double click on the Contoso – VSD VM and click the Power Button to start it.
2. Start the setup of CentOS:centos2_thumb[2]
3. Proceed to setup choosing the desired keyboard, then select “Basic Storage Device” and “Yes, Discard Any Data”

Type the hostname for this machine “vsd.contoso.local” and the desired timezone.

Select the root password and Use All Space, Write Changes to Disk.

Click Done and Begin Installation.

4. Once the setup is finished, restart the virtual machine and log in to do basic networking setup:

dhclient eth0

In order to edit my configuration files, I don’t like vi and I prefer nano, so I get it online.

sudo yum install nano –y

Edit the file Ethernet NIC settings to match your network:

nano /etc/sysconfig/network-scripts/ifcfg-eth0

DEVICE=”eth0″

NM_CONTROLLED=”no”

ONBOOT=”yes”

TYPE=”Ethernet”

BOOTPROTO=”static”

IPADDR=192.168.0.95

GATEWAY=192.168.0.1

NETMASK=255.255.255.0

Then verify the network name:

nano /etc/sysconfig/network

NETWORKING=yes

HOSTNAME=vsd.contoso.local

Add the server IP address to the host file:

nano /etc/hosts

192.168.0.95 vsd.contoso.local

Restart networking:

nano service network restart

Check your hostname settings with the following command:

hostname -f

5. Install and configure NTP service:

sudo yum install ntp -y

sudo nano /etc/ntp.conf

Modify the ntp.conf to have the internal server:

nano /etc/ntp.conf

server 192.168.0.211

We choose to use a local NTP server in our environment with IP address 192.168.0.211. Please note that Microsoft Active Directory provides a NTP server feature, however, we are not able to use it as a time source for VSD, so we use an alternate NTP Server.

Save the file and restart the NTP client:

sudo service ntpd restart

Set the ntpd service to start automatically:

sudo chkconfig ntpd on

Verify that host is synchronized by using the following command:

ntpstat

centos3_thumb[2]

6. We will pin our distribution to CentOS 6.7 repository in order to avoid it to be upgraded to later builds.

We create a new file with repo information:

sudo nano /etc/yum.repos.d/c67.repo

[c67]

name=CentOS67

enabled=1

gpgcheck=0

baseurl=http://vault.centos.org/6.7/os/x86_64/

7. Install dependencies

sudo yum install openssh-clients libedit bind-utils -y

Linux Integration Services Update

Microsoft regularly updates Kernel driver and user mode components in order to make Linux work best and add new supported features. We need to install Linux Integrated Services (LIS) in order to ensure best behavior.

1. Open a SSH session to the newly configured machine, in this guide, we use MobaXTerm:

lis1_thumb[3]

2. Download LIS 4.1.2 components from Microsoft Website with the following command:

sudo yum install wget -y

wget https://download.microsoft.com/download/7/6/B/76BE7A6E-E39F-436C-9353-F4B44EF966E9/lis-rpms-4.1.2-1.tar.gz

3. Extract the files using the following command:

tar -xvzf lis-rpms-4.1.2-1.tar.gz

4. Update the components using:

cd LISISO/

sudo ./upgrade.sh

lis2_thumb[2]

5. Once the setup is finished, restart the virtual machine and log back in.

Deploying the VSD Components on the VM

In this section, we will copy the VSD installation binaries to the VSD VM and proceed to setup.

1. Extract the “Nuage-VSD-*-ISO.tar.gz” file that you have downloaded. Get the .ISO file and go to Hyper-V manager and mount it to the “CONTOSO-VSD” VM.
2. Mount the ISO file on your system:

sudo mkdir /media/cdrom

sudo mount /dev/sr0 /media/cdrom

3. Launch VSD Setup process:

cd /media/cdrom

sudo ./install.sh

vsd3_thumb[3]

Select standalone option by hitting s and confirm with yes.

vsd4_thumb[1]

4. Wait for the install to finish, note that it can take several minutes.

Once the setup is finished, you can check that all the components are active using the following command:

monit summary

This should display you the following output for a fully ready environment:

vsd5_thumb[2]

Verify that VSD is operational

Once the setup has completed, you can verify the configuration and log in the portal for the first time. After reviewing operations, you will be able to install a product key to start using licensed features of your VSD.

1. Open your favorite browser and enter the URL:

https://192.168.0.95:8443

Add exception to your browser as this is expected for a first configuration running with self-signed certificate

vsd6_thumb[2]

2. Login with the default credentials:

vsd7_thumb[2]

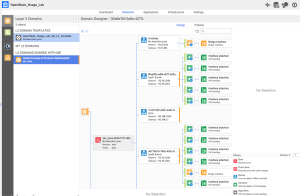
3. Welcome to the world of VSD!

vsdui.png

So that you have VSD installed, you can start playing and creating organizations, networks, network policies.

But in order to have it enforced somewhere, you need a network controller. Monitor this blog and we will review the steps to make Nuage Networks controller run on Hyper-V!

For more information:

You can also reach me at my email if you need more info and trial: [first].[last]@nuagenetworks.net!

Arnaud

Virtualized Services Directory on Hyper-V for Windows Server 2012 R2 – part 1

In Nuage Networks solutions family (see previous post for a quick intro), Virtualized Services Directory is the foundation for enterprise-class SDN. VSD serves as a policy, business logic and analytics engine for the network services.

VSD includes the architect role, a HTML5-based UI that allows operations to occur in a user-friendly way. It also comes with a command line interface and every single operation can also be done by REST API calls.

VSD contains a multi-tenanted service directory that supports role-based administration of users, compute and network resources. It also manages network resource assignments such as IP and MAC addresses.

For the purpose of network service assurance, the VSD allows the definition of statistics rules such as collection frequencies, rolling averages and samples, as well as Threshold Crossing Alerts. When a TCA occurs, it will trigger an event that can be exported to external systems through a generic messaging bus. Statistics are aggregated over hours, days and months and stored in an analytics cluster to facilitate data mining and performance reporting.


VSD Supported Configurations

VSD supported configurations are detailed here, but in a nutshell, VSD is composed of two roles:

  • VSD Server itself
  • VSD Statistics server (can be a Hadoop or Elastic Search storage)

In this post, I will focus on VSD Server itself.

The VSD can be deployed stand-alone for testing and validation environments, and will be deployed in clusters for production environments in order to achieve high-availability and scaling needs.

As a customer, Nuage Networks provides you with the following form factors for VSD server deployment:

  • VMware Image: supported on ESXi 5.5/6.0
  • QCOW Image: supported on KVM for CentOS 6.X, RHEL 6.X/7.X
  • ISO file for your own setup.

The ISO files allows it to be deployed on a physical server running: CentOS and RHEL versions 6.5, 6.6 and 6.7 with minimal install.


Objectives of this setup

So there is no reference to Hyper-V in the supported platforms list, but it was too tempting for me not to test it’s installation and running.

Warning! This post does not depict any current Nuage Networks best practice nor supported configuration for hosting VSD platform.

I will provide here some platform-level recommendations to make VSD usable for some small demo/POC environments where you want the platform to be usable and stable.

We will deploy a VSD role on a Hyper-V host name CLOUDHOST, which is running Windows Server 2012 R2. This host has an external virtual switch called “Management” which is linked to the datacenter world and has connectivity to the Internet.

image


Prerequisites for this setup

In order to start with this setup, you should have the following elements available:

  • A running Windows Server 2012 R2 host machine with Hyper-V role, management console and PowerShell enabled.
  • Latest VSD binaries from Nokia Online Support Center.
  • CentOS 6.7 ISO Minimal Install Setup files.
  • SSH Client: Anything like Putty, I personally like MobaXterm.
  • A NTP server.
  • The VSD VM will need internet connectivity to download various components during the setup process.


VSD VM Recommendations for Hyper-V

The first step consists of creating a Hyper-V Virtual Machine with CentOS 6.7 binaries installed. The specifics recommended parameters (Recommended by me, not officially Nuage Networks!) for this VM are:

Configuration item   Recommended value
VM Generation
  • Generation 1
RAM
  • 8192 GB (bare minimum)
  • NO dynamic memory used
Processor
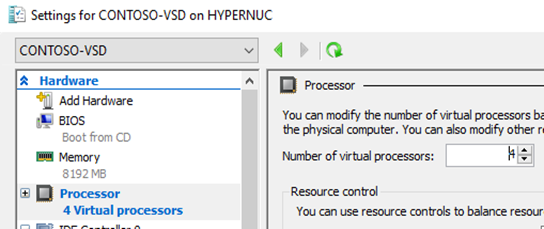
  • 4 vCPU or more
Disk type and Size
  • Use VHDX format
  • Dynamic Size (127 GB by default)
NIC Configuration
  • 1 VNIC for management
  • Use Synthetic NIC and not the emulated (legacy)
Integration services
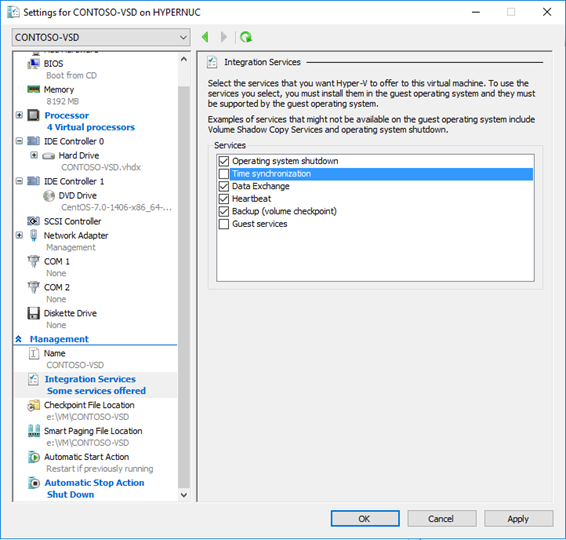
  • NOT using the Time Synchronization option
  • Stop action: Shutdown the guest operating system

VM Creation

In Windows Server 2012 R2 UI, the following steps need to be completed:

1. Open the Hyper-V management console. In the Server Manager, select Hyper-V, right click on the computer name and select Hyper-V Manager.
2. On the right side on the management console, select New then Virtual Machine

hv1

3. On the New Virtual Machine Wizard, click Next
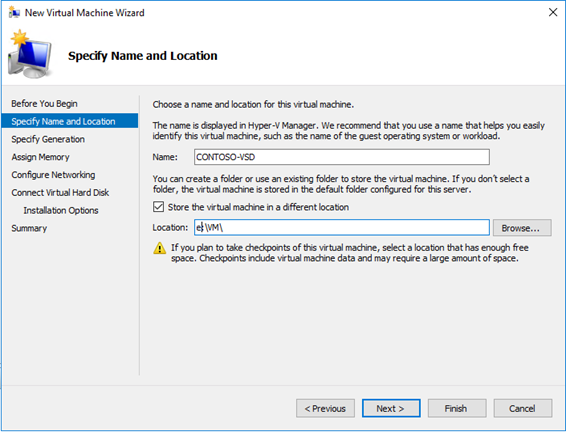
4. Type a name for the Virtual Machine you created: CONTOSO-VSDhv2
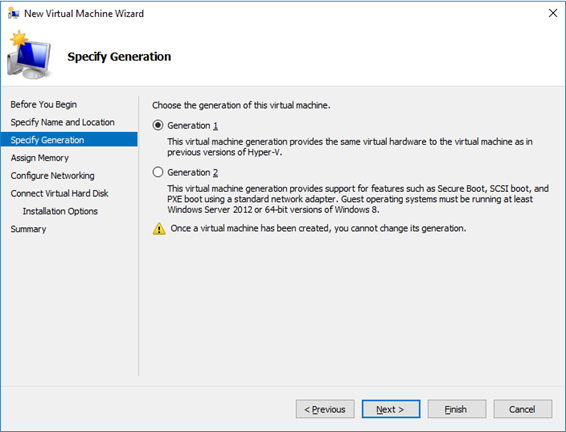
5. Create a Generation 1 virtual machine:hv3
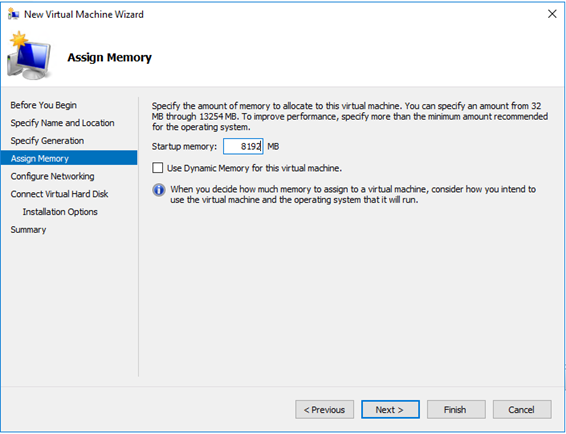
6. Specify 8192MB of RAM, verify that the checkbox “Use dynamic memory” is NOT enabled.hv4
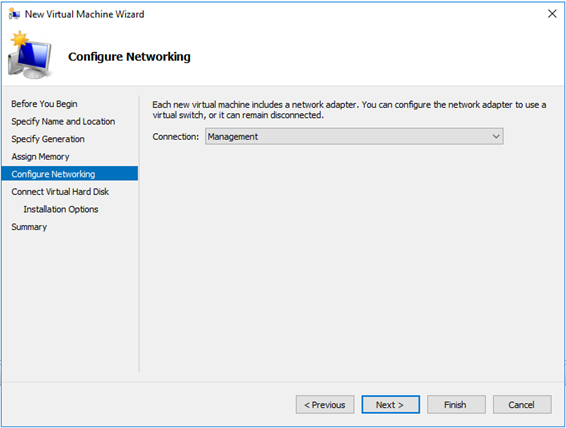
7. Connect the virtual machine to the Management network Interface or any suitable virtual switch for your environment. hv5
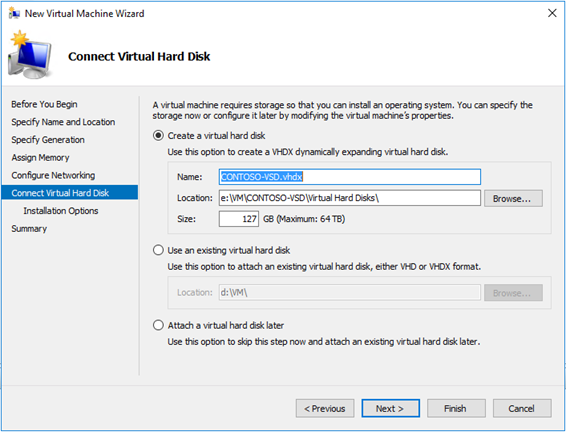
8. Create the virtual hard disk file on the desired path:hv6
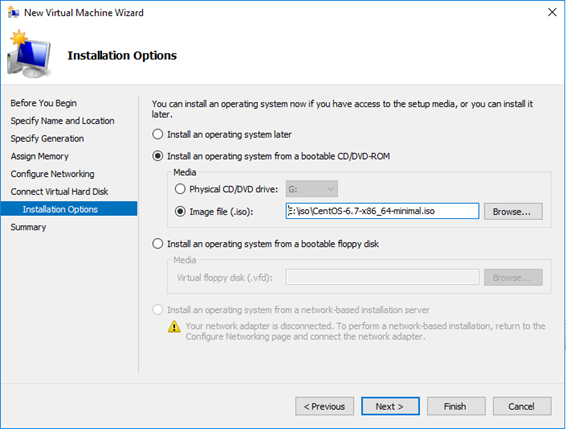
9. Specify “Install an operating system from a bootable CD/DVD-ROM” and select the location of your CentOS 6.7 installation media hv7
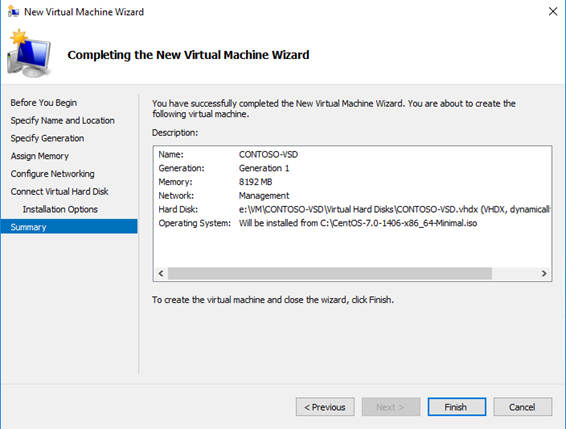
10. Review the parameters and click Finish: hv8

Do not start the VM, we need to modify additional settings.

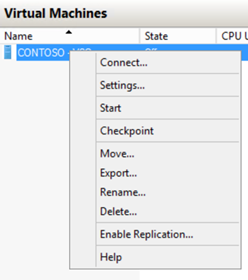
11. Once the VM has been created, right click on it and select Settingshv9
12. In the processor section, add cores to have at least 4 virtual CPUhv10
13. Go to the Integration Services section of the Virtual Machine and

  • Uncheck the “Time Synchronization” item as we will use the NTP service to have consistent time-stamps with the whole Nuage Architecture
  • In the Automatic Stop Action, select “Shutdown the guest operating system”. hv11
14. Click OK to confirm the VM settings.

VM Creation: PowerShell

If you prefer to use PowerShell, you can do the previous steps in just a couple of lines where I define the following variables:

  • vmpath and vhdpath as the paths for the VM and the virtual hard disk file to be created.
  • vmname as the name of the VM.
  • vmswitchname as the name of the hyper-v virtual switch where this VM will be attached.
  • Linuxisopath with the path to the CentOS 6.7 minimal install ISO.

$vmpath=”C:\VM\CONTOSOVSD”
$vhdpath=”C:\VM\CONTOSOVSD\contoso2.vhdx”
$vmname=”CONTOSO-VSD2″
$vswitchname=”Management”
$linuxisopath=”E:\iso\CentOS-6.7-x86_64-minimal.iso”

New-VM -NewVHDPath $vhdpath -NewVHDSizeBytes 127GB -Generation 1 -MemoryStartupBytes 8GB -Name $vmname -Path $vmpath -SwitchName $vswitchname
Set-VM -Name $vmname -ProcessorCount 4 -AutomaticStopAction ShutDown
Get-VMIntegrationService -VMName $vmname -Name “Time Synchronization” | Disable-VMIntegrationService
Set-VMDvdDrive -VMName $vmname -Path $linuxisopath
Start-VM -Name $vmname


This is quick so in many times, I prefer PowerShell!

That was easy! This is it for this first part of this post, in the second part, we will proceed to Linux CentOS 6.7 setup with the prerequisites for VSD and proceed to VSD server setup!

For more information in the meantime:

Arnaud